Quick Start
Using MediaPipe4U for motion capture requires only three steps:
- Prepare runtime components: create an Unreal Engine
Actorcontaining the runtime components. - Prepare a motion-capture character: create an Unreal Engine
Characterto display the animation. - Start motion capture: create a Blueprint that starts the motion-capture program.
If your Unreal Engine project is ready and MediaPipe4U is installed, this tutorial takes only about 3-5 minutes.
Prepare Runtime Components
Create an Actor and add MediaPipeHolisticComponent.
This example names the Actor Actor_QuickStart_Runtime.
Add these components:
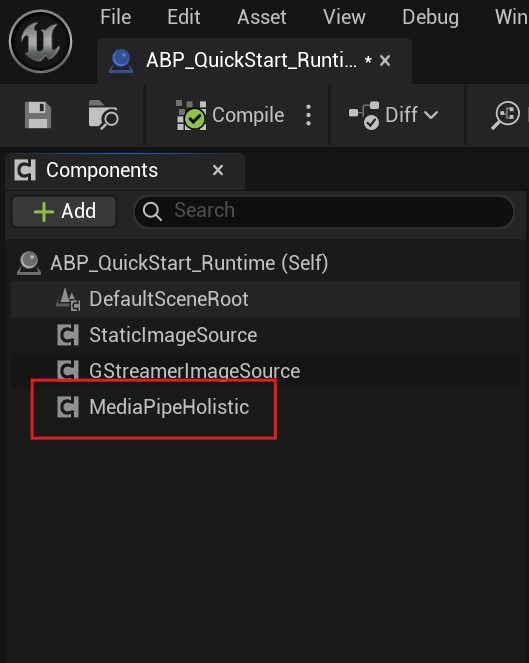
MediaPipeHolisticComponent: core motion-capture algorithm componentStaticImageSourceComponent: optional; captures motion from a single imageGStreamerImageSourceComponent: optional; captures motion from a video file
The completed Actor_QuickStart_Runtime should look like this:
Prepare the Motion-Capture Character
Create an Animation Blueprint
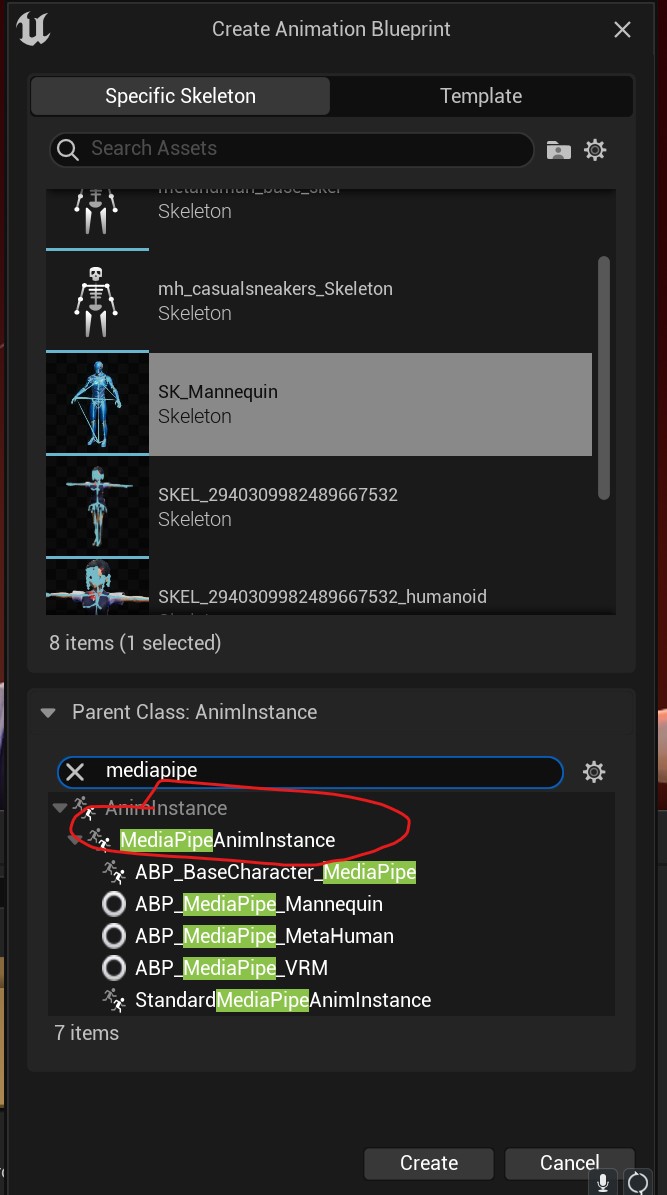
Create an Animation Blueprint with MediaPipeAnimInstace as its base class and use Unreal Engine 5's built-in SK_Mannequin as its skeletal mesh.
This example names it ABP_Mannequins_MediaPipe.
Open it and add these Blueprint nodes in order:
MediaPipePoseSolver: pose solverMediaPipeHandSolver: hand/finger solverMediaPipeLocationSolver: location/translation solverMediaPipeHeadSolver: head solver
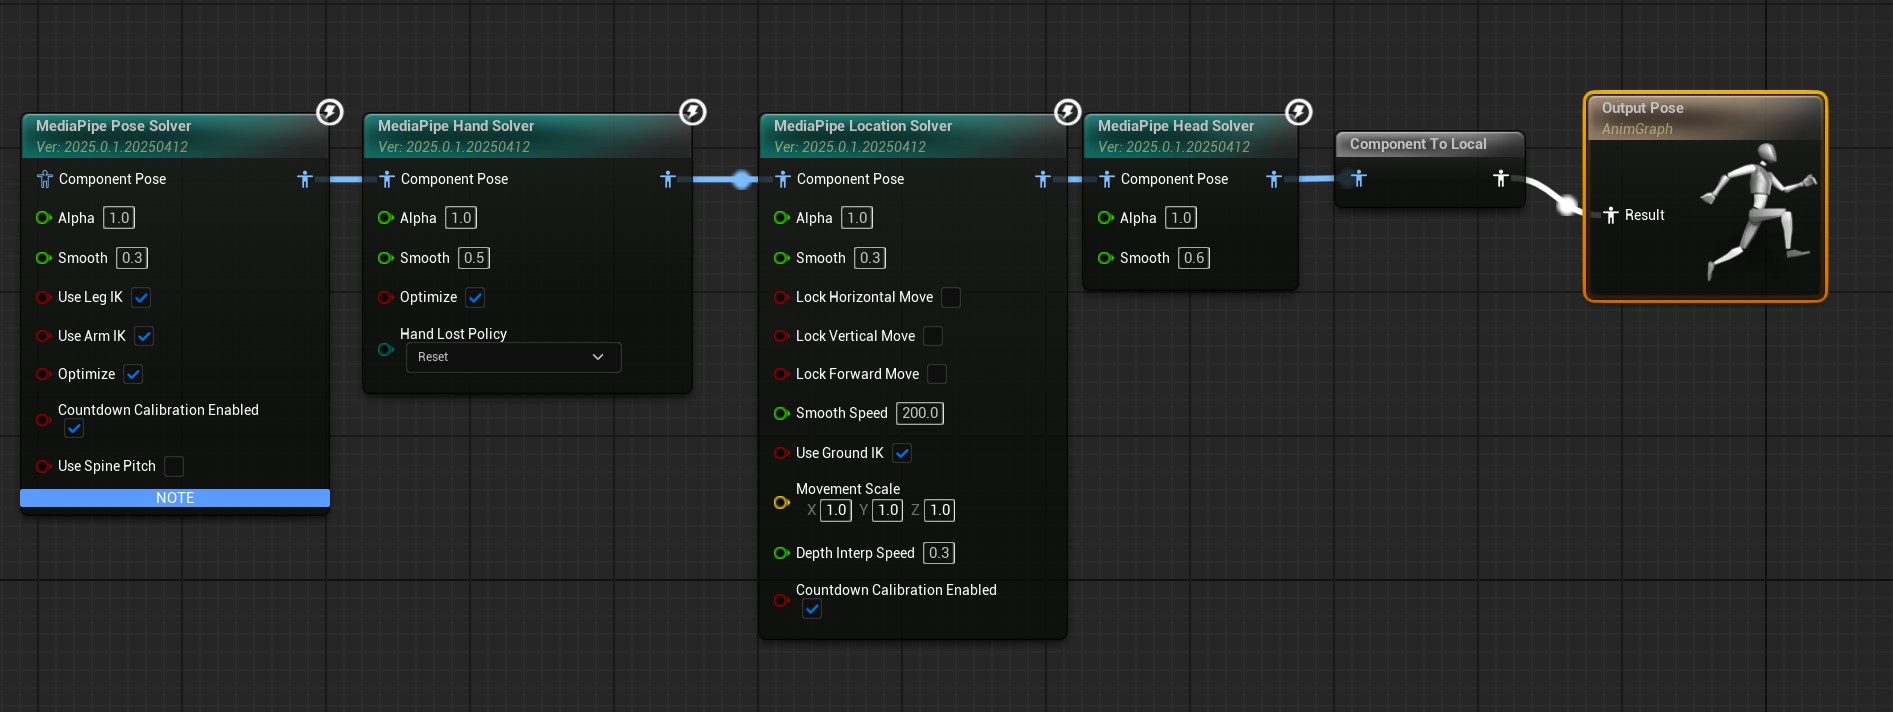
Save and compile the Animation Blueprint.
Create a Character
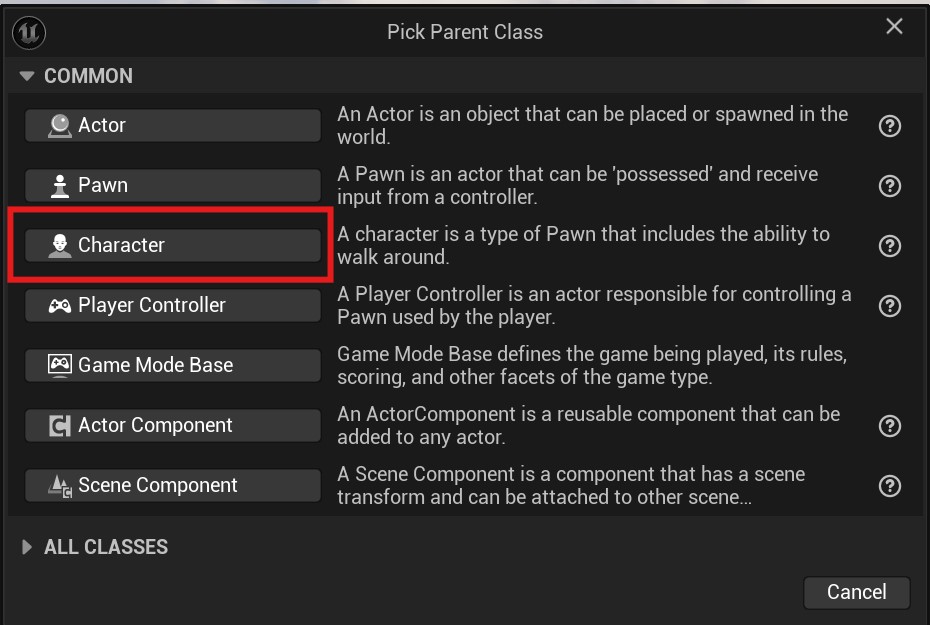
Create a Blueprint based on Character; this example names it Character_MediaPipe.
Open Character_MediaPipe, select Class Defaults, choose the Skeletal Mesh asset in Details, and set Anim Class to ABP_Mannequins_MediaPipe.
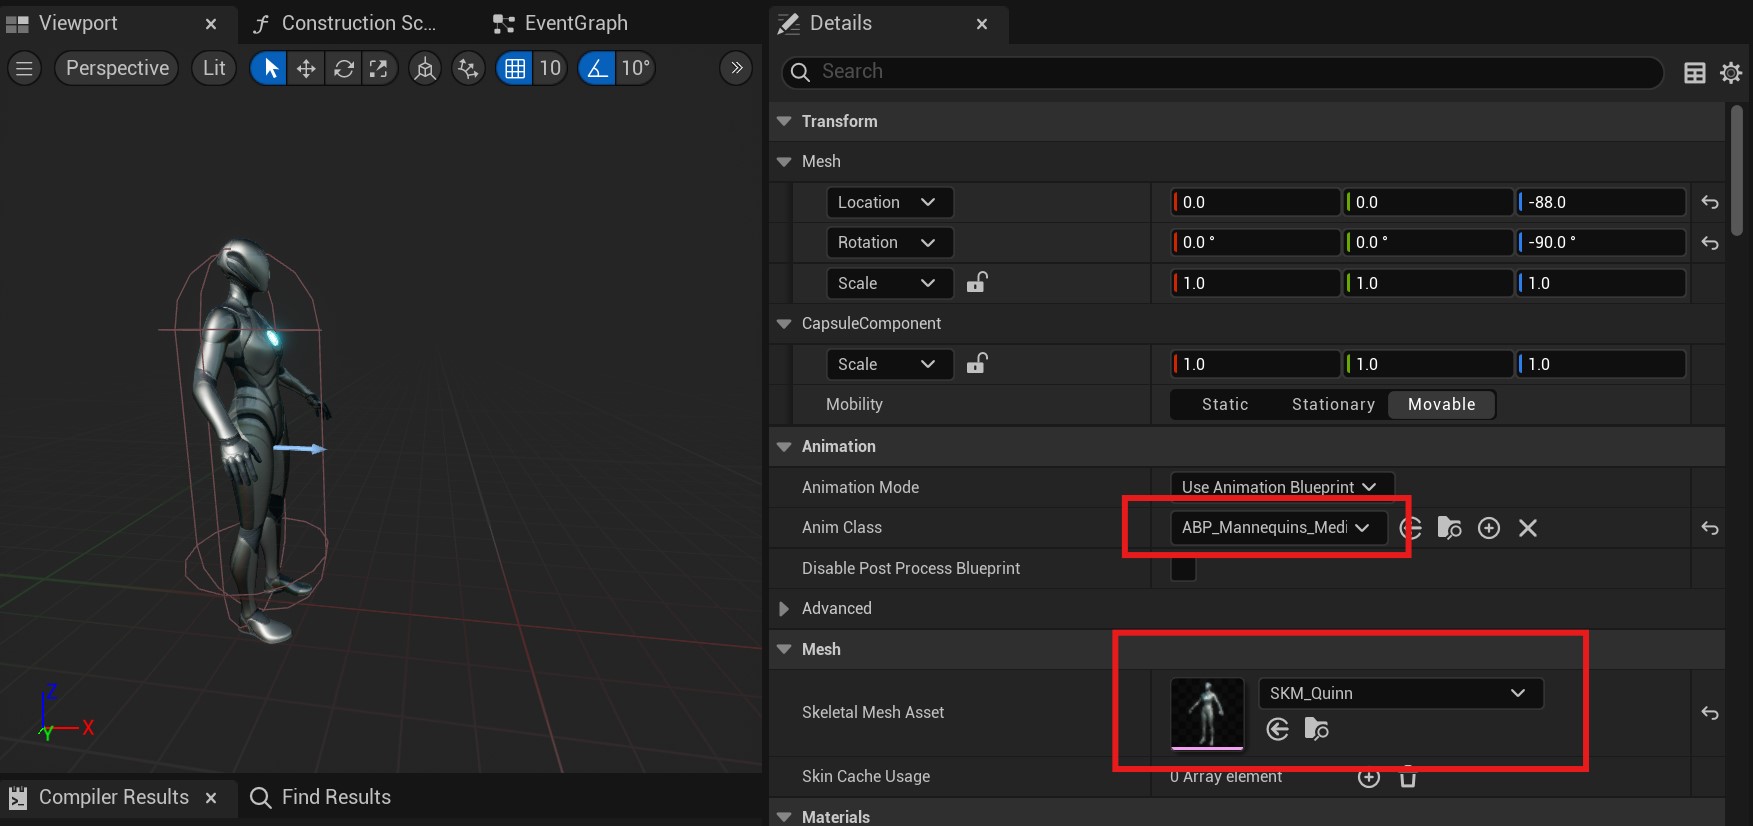
Save and compile the Character Blueprint.
Start Motion Capture
Create a Level
Create a Level named QuickStart in this example.
Place these Blueprints in the Level:
Character_MediaPipe: motion-capture Character.Actor_QuickStart_Runtime: runtime-component Actor.
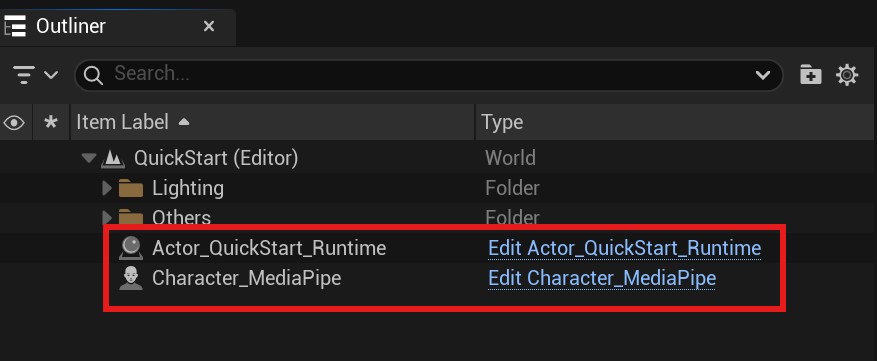
Edit the Level Blueprint
Open the Level Blueprint and add the following nodes.
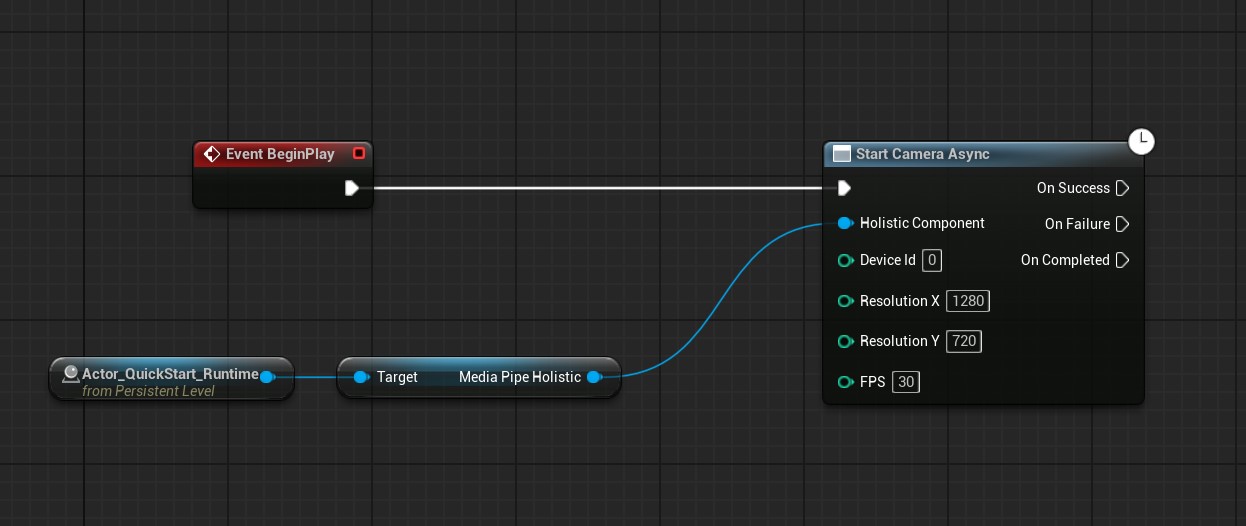
Save and compile the Level Blueprint.
Run the Level
Run the Level. It opens the camera and drives the 3D character with captured human motion.
Capture Motion from a Video File
Modify the Level Blueprint to use GStreamerImageSourceComponent.
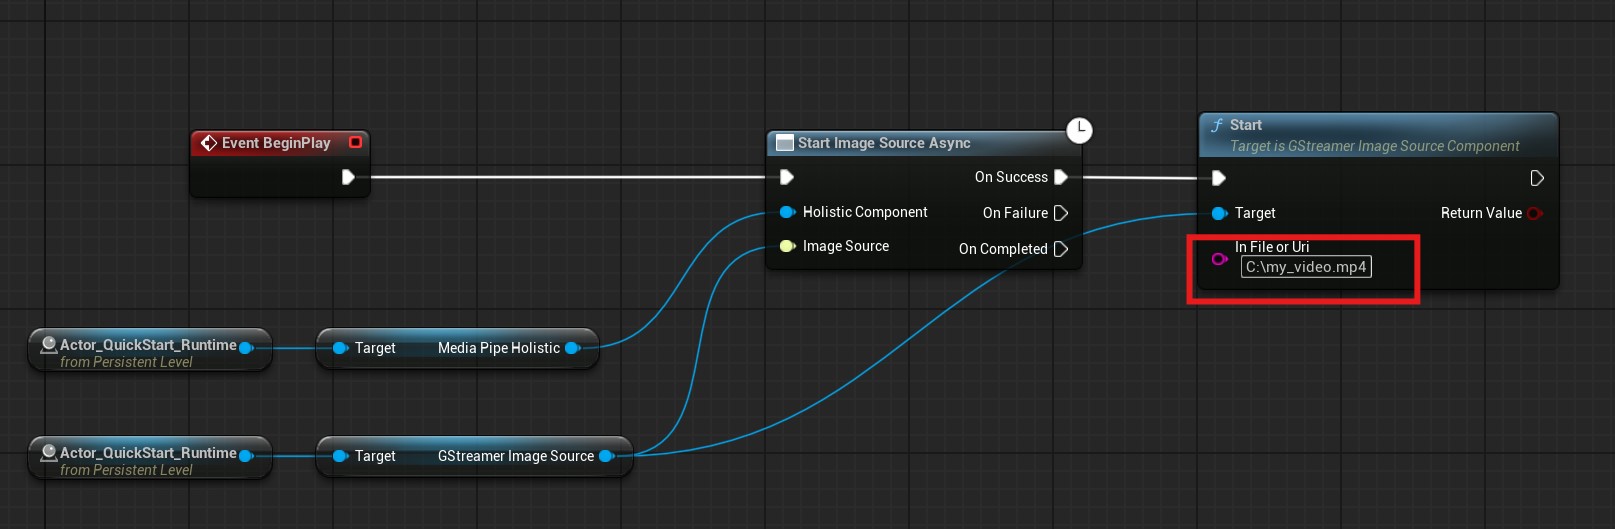
Save and compile, then rerun the Level to capture motion from C:\my_video.mp4 and drive the character.
Capture Motion from an Image File
Modify the Level Blueprint to use StaticImageSourceComponent.
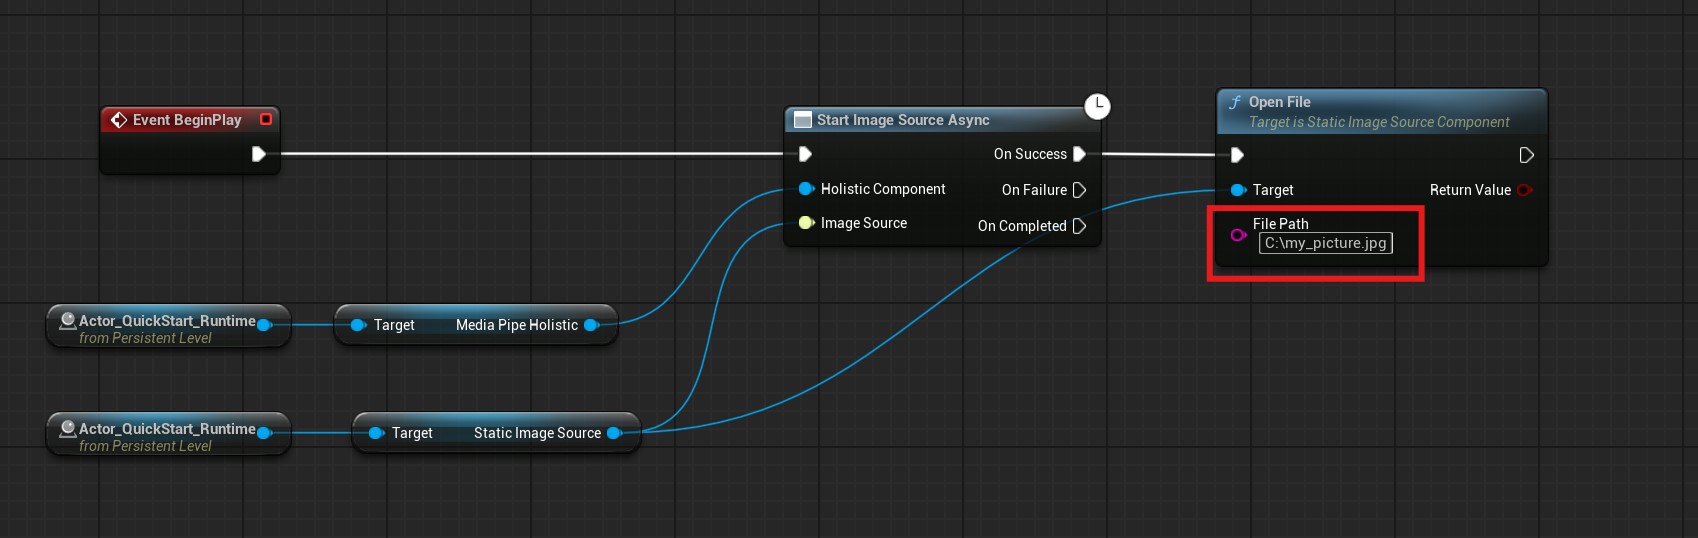
Save and compile, then rerun the Level to capture motion from C:\my_picture.jpg and drive the character.